So I am back with another pair of air coolers, the Thermaltake Toughair 510 & Toughair 310 this time. These air coolers were also sent to me by Thermaltake and I thank them for that. But as always, this review is going to be honest.

I have the toughair 310 and 510 here and to my surprise they are the exact same air coolers, which have the exact same heatsink. The 510 just has an extra fan for the push-pull configuration.

This means the naming could have been better and the toughair 310 could have been called 310 plus or 310 pro or 310 pro max? Because putting a new number on an air cooler with just an extra fan in the box could be a bit deceiving for many average consumers. I guess this is why the TDP coverage of both these air coolers just differs by 10-degree Celsius.


Both the coolers come with all the mounts and parts except for the LGA1700 socket at the time of me making this review. But I am pretty sure in the future stock it would be there. But anyway check before ordering.

The backplate for both AMD and Intel is the same and is plastic. There’s also a thermal paste with an applicator. The tougher 510 will come with a fan splitter as it has 2 fans – so obviously 4 fan mounts. The 310 has 1 fan, so no fan splitter and

This honeycomb grid can be used to put the thermal paste in a pattern on the chipset but I am pretty sure, nobody got time for that.

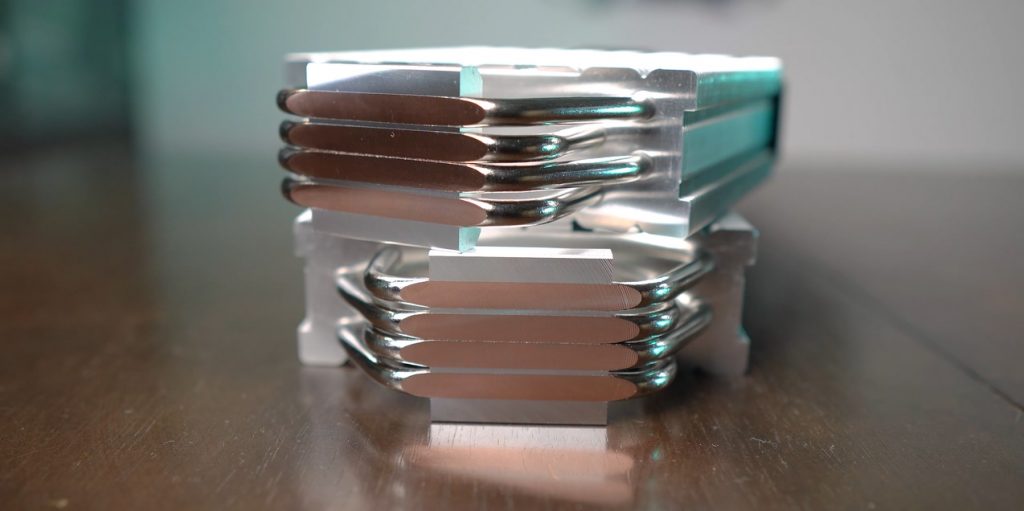
Both the heatsinks have the same number of fins on them. And 4 copper heat pipes on the bottom which are supposed to touch the IHS of the chipset directly.


One weird thing which came in the box was this warning note that says to run the water cooling system outside of a case to test it before you put it inside of a case. But I am not sure why it didn’t come with the Thermaltake AIOs that I tested. And is now coming with coolers which have names like tough air and not tough water.

I truly loved the fan’s build quality and the color tone for the design on them. It looks rock solid and quite industrial which I personally like to see on stuff like this. I think these are the same toughfan 12 which Thermaltake sells separately too at about 1400 rupees or 20 us dollars.

Seeing this fan bundled with these coolers kinda justifies the price these coolers have as they are some of the best performing static fans right now with a static pressure of 2.41 mm-H2O.

The price of toughair 310 is 3500 rupees and toughair 510 is 4000 rupees, which actually makes the 510 look pretty good for the price because of the 2 fans.
🛒Amazon India [Paid links]
🛒Toughair 310 – https://amzn.to/3FPU04N
🛒Toughair 510 – https://amzn.to/33D0Vl1
🛒Amazon US [Paid links]
🛒Toughair 310 – https://amzn.to/32s7zda
🛒Toughair 510 – https://amzn.to/3KEqDGu

There are rubber pads on all 4 sides of the fans. And they are there on the brackets which attach these fans on the heatsink too.
Also, the 510’s heatsink top plastic cover on my review unit was loose. I guess it was just a faulty unit as on the 310 it was perfectly fine. The fins on both the heatsinks had no bents and were pretty much straight like me.

But I do admire the design of these covers on the top of the heatsink. Good job here. Nothing tacky and no RGB shiz.
Well, the installation process of these air coolers kinda reminded me of the recent AIOs I reviewed by Thermaltake and how similar the process was.

The backplate for both the AMD and intel mount is the same. Whichever platform you are using, the text of it will be visible right on the top once you put the backplate in. Unlike the Thermaltake AIOs where just the opposite happened.
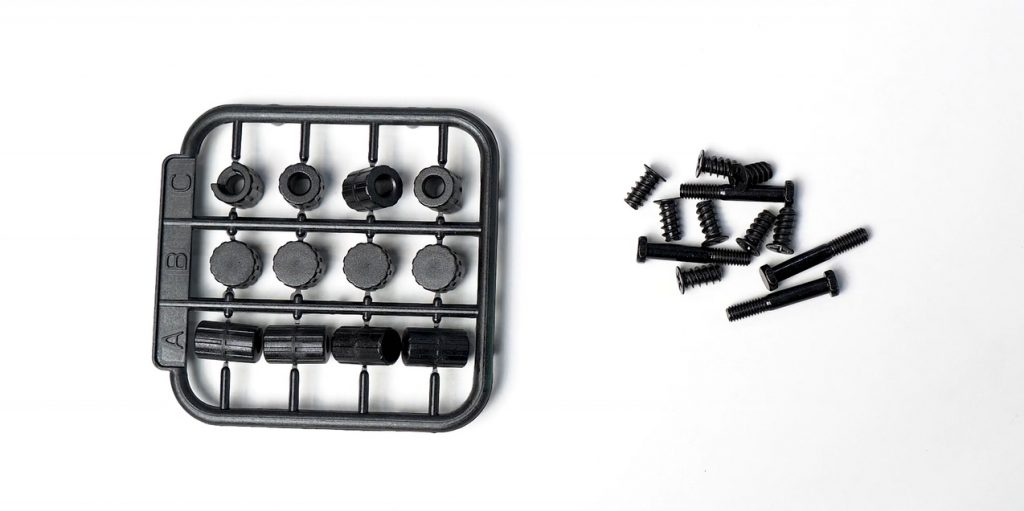
The long screws will insert and lock properly inside the bracket. So just make sure they flush in properly. After putting the backplate in, take out the A and B spacers and caps out for the AMD platform. Or B and C spacers and caps out for the Intels.

Place the longer spacers first and then the metal bracket on top of it. At first, I decided to be gutsy and didn’t care about the orientation the manual suggested, so then I changed it later to devoid myself of the OCD which might hit me later.


Then after that just screw the caps in firmly, and put the thermal paste on the processor, and put the heatsink on top of it. Then put the securing brace and make it rest within the inside slot and then tighten the 2 screws one by one.

Then screw the fan brackets on the fans. You have to do this just once for the 310 and twice for the 510. For the 510 make sure you put the fans in push-pull configuration otherwise you’d be like this cooler sucks.

Because the heatsink is quite thin, you won’t face any sort of RAM clearance issue with any of these air coolers.
After that just put the single fan connector or the 2 fans with the splitter cable in the CPU fan chassis connector on the motherboard and you are done.
Now if you think the process was longer than most modern air coolers then I’d say you are absolutely right. But installing a cooler is an affair which most of you have to do only once so I don’t really deduct a lot of points here for coolers and AIOs which might or might not need more time in installing them as compared to their competition.

The cooler looks nice in black a case with more black stuff inside of it. I honestly do like how it looks overall even without the extra RGB boost performance slapped over it.
Now I am going to test the coolers on a Ryzen 9 3900X chip at different power consumption levels.

Looking at average temperatures during the full Cinebench R23 benchmark run test; with the case covers open, the 310 and 510 perform pretty close to each other till the 175 watts mark – where the difference is 3 degrees celsius. Do note that these are delta temperatures and the ambient temperature was around 19 to 20 degrees celsius.

And as you can notice in these max temperatures graphs, both the coolers will do a fine job for processors that can eat up to a hundred and 125 watts of power. As even in summers, when you add up to, let’s say 15 or 20 degrees more to these results the temperature wouldn’t cross 90 degrees Celsius.
But the 150 and 175-watt results are not looking good and I wouldn’t recommend any of these coolers for processors that can eat up to that many watts of power.

In gaming, during both the shadow of the tomb raider and Godfall benchmark tests, the average temperatures stayed mostly around 60 degrees celsius. With fans running pretty silently at around 1200 RPM. As expected, for gaming both of these air coolers will be fine.

The idles were 4 degrees better on the 510 when the Ryzen 9 was at stock settings.

And with the default fan curves set, these are the average RPMs at which the fan on the 310 and the 2 fans on the 510 ran. And as it’s apparent, above the 150 watts mark, the fans had to run at their maximum speed.
And yeah, as stated earlier the bundled fans with these air coolers are pretty exceptional and that is probably why even when they were running at a hundred percent speed, the noise from them was acceptable. (Noise test from 6:40 in the video posted above)
So yeah pretty decent air coolers. I expected really nothing exceptional from them seeing how compact their heatsink size is on both the models. I bet most of the work is being done by the fans on them anyway.
If you need a compact, no RGB crap air cooler in your build then you can definitely consider any of these options. But I wouldn’t really wanna pair them with anything above the Intel i5s or the Ryzen 5s.
But Thermaltake really needs to check its pricing here if it wants to survive in the market. I understand the cooler build quality is far superior to many other cheaper options that I have tested in the past. But then people in the end just care about how a thing performs, how it looks and how much money it is asking for.
If you liked my effort you can consider buying them from the affiliate links I will post below. You can also hop on to our discord server for more chit-chat on relevant content.
💬Discord: https://discord.gg/TsMHuPhjQ
Stay safe humans, that’s all for today. MuBot out.
☕ Support the website: https://www.buymeacoffee.com/mrmubot
💬Telegram: https://t.me/MrMuBot
🌐Instagram, Facebook & Twitter handle – /MrMuBot

