


The Antec 1000 HCG extreme. Now just because I make youtube videos, whatever close to tech things I do in life, it always makes me wonder if that specific activity could be good content too. Now because there was no proper guide regarding how to install the Antec HCG 1000W power supply, I thought why not just make one. As most of the non-modular power supplies get installed similarly you can use this guide for a lot of different PSUs installations for your PC.

So yeah this odd color-themed-looking PSU might not be liked by everyone. But I care the least as it is going to anyway hide behind the PSU shroud. And I bought it because of its power efficiency rating, 10-year warranty and because I got a really good deal on it in times of corona inflated pricing everywhere.

This PSU specifically comes with a hybrid mode button – which when enabled allows the fan to switch off completely under low load situations. Being a 1000 watt PSU, there are many sockets for a lot of components and peripherals which the power supply can easily support laughingly. Well, until you throw three 3090s on it. But let’s be real. No one is that rich.

In the package, you get 6 PCI-E cables out of which 2 are dual daisy-chained 8-pin PCIe connectors. And the rest 4 are dedicated 8-pin PCIe connectors. These cables are mostly used to power your GPUs. But strangely the dual daisy-chained 8-pin connector cable was thinner than the single 8-pin connector PCIe cable.

And then there are two CPU 8 pin connector cables to power on, you guessed it, your CPU. And because you install your CPU on the motherboard, these wires will go inside the motherboard.

But then that’s not the only cable that goes inside the motherboard. The 20+4 pin 12V ATX connector cable goes into the main 24 or 20 pin socket on your motherboard. In case your motherboard just needs a 20 pin connector, you can plug only that part and leave the rest of the 4 pins just hanging there lonely without a soul-mate ever in their life.

Then there are 3 cables with multiple SATA ports to power on your hard disk drives etc. And 1 Molex cable with 4 Molex connectors and some SATA ports if you are still using a few non-SATA powered hard drives. Or if for example some fans of your case which might need the Molex connector to power on.

And the most important floppy disk drive connector to decrypt those old area 51 files which will reveal more about the aliens to humanity when the time is right.

Then of course there is a 16amp power plug with a fuse inside of it, which would need an adaptor for India’s power sockets. I don’t know but it’s just the weirdest thing that the PSUs here still don’t come with pins compatible with our wall sockets. They could if they just put a little extra effort but they have been mostly like meh about it so far. So buy that extra adapter.

And in the box, there were some Antec bands and zip ties for cable management which is still mostly alien to me.
So before installing the PSU inside the case, you gotta make sure you understand what are the existing components in your system to which you are going to give power to like how Heman did to Castle Grayskull.
Of course, you’d have a motherboard in the system because no one likes fathers terminology in the tech realm. Apart from it, you might also have a graphic card, which in my case was the RTX 3080 FE which needs two 8-pin PCIe connectors. You might also have a few hard drives like I have one of them but as it’s a SATA drive I don’t need the Molex connector cable. But because this PSU also comes with a power cable that has a mix of SATA and Molex connectors on it, I decided to go with it as at this stage I recalled the ARGB fans might need a Molex to power on.

Now, these pins on the connectors and the sockets on the PSU are keyed. And by keyed I mean they have differently shaped plastic housing over them. They are mainly a square and an edgy D. This is so that the installation is foolproof. So if a connector doesn’t go inside a port, there’s a possibility you are not plugging them correctly. So cross-check the connectors with the PSU and other component ports.
Also, it’s better to pre-plan in which orientation you are going to put your PSU and plug these cables keeping in mind they don’t stretch much, in case any of them is shorter. So because I am going to put my PSU fan facing down, I will put the cables in this orientation only.

So at first, I will install the connectors to the PSU before putting the PSU in the case. As because of the shroud it won’t be easy to push my hand down the very narrow area later to plug the connectors in. Also, this is just kinda sorta common sense so yeah.

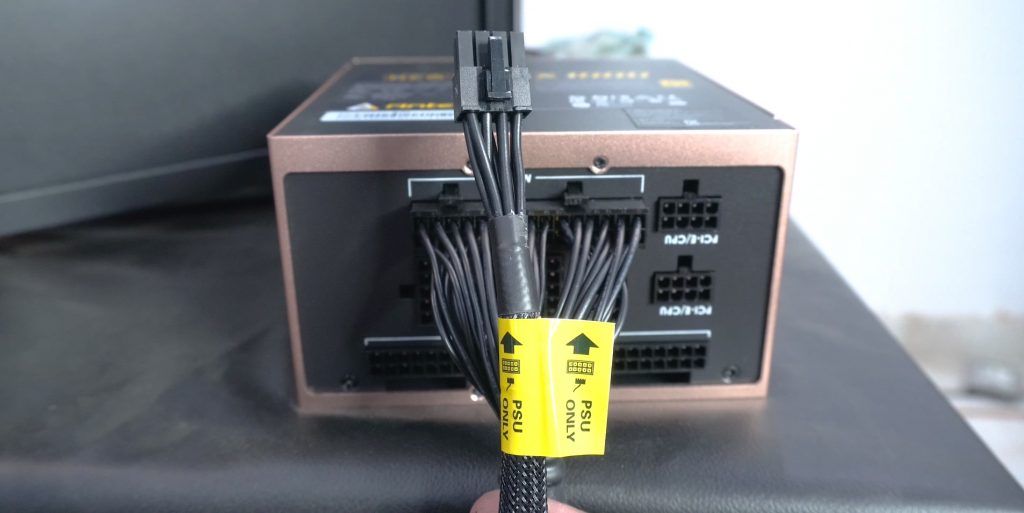
So I began with the 24 pin connector first, because well, it seemed easier. The PSU clearly says M/B which means motherboard so this first step was as easy as a lego game with a manual of course. Make sure you put the correct side of the connector inside the PSU sockets. And to make things even easier the cables have a sticker at one end to specify which side will go inside the PSU. Also the clips on top of these connectors, well, they will just clip so that you can start clipping the next one.
So the next cable I decided to put was the CPU ATX 12V one. Now you’d see that basically, all the ports say PCI-e/CPU on them. So I can use any of these ports as long as long as the total 8 pins go inside correctly in either one of them.

I could have used these 2 separate PCI/CPU pins too but I thought to reserve them for my GPU. There is no technical reason behind this as I mostly went with the flow.

Now at first, for the GPU I used the daisy-chained two 8-pin cables but later replaced it with a single dedicated 8 pin cable and installed 2 of them to power the RTX 3080 in my system. The RTX 3080 FE uses a peak power of 320 watts and I don’t plan to overclock it. But just because these extra PCI-e slots and cables have no other purpose, it just felt better to me to give the GPU power without daisy-chaining and use the 2 dedicated PCI-e cables instead. I mean I would recommend you the same if your PSU allows but don’t stress too much as long as you are not overclocking the graphic card.


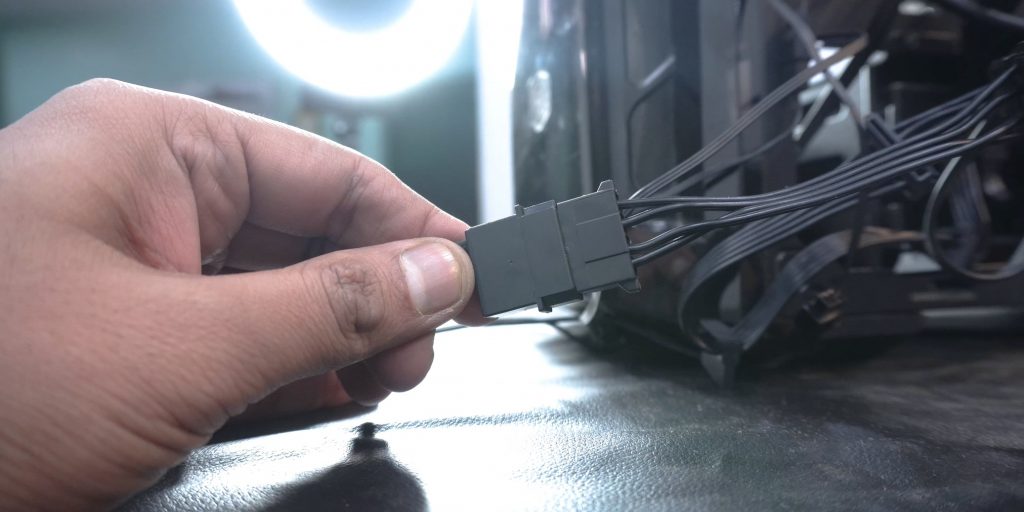
Now, these 5 pin connectors are for the cable which will power my system’s hard drives, and as mentioned earlier they are a mix of Molex and SATA power connectors.

Now after installing all the cables I will carefully put the PSU in the same orientation in the PSU’s slot and I am again iterating the fan will face down so that it can suck the air from the bottom of the case and throw out from behind. But if your case doesn’t have vents on the bottom, or if it doesn’t have feet for air circulation, OR if you are putting it on a mushy thick carpet, then you should definitely make the intake fan of the PSU face upward. Because really, in all those scenarios it will be anyway tough for the PSU to suck any air in the first place.

Make sure you screw your PSU because no one likes things dangling around their PC. And then let’s start connecting stuff to these hungry cable connectors.

As already mentioned, I had put the daisy-chained cable to the GPU first and later replaced them with two 8-pin cables. Pull them back in the PSU shroud as no one likes looking at ugly stock cables in the PCMR community.

After connecting the GPU, my hands moved to connect the 24 pin ATX connector. This might need moderate hulk power at times but just don’t put too much force into it and be sure the connection is keyed right before pushing it in.

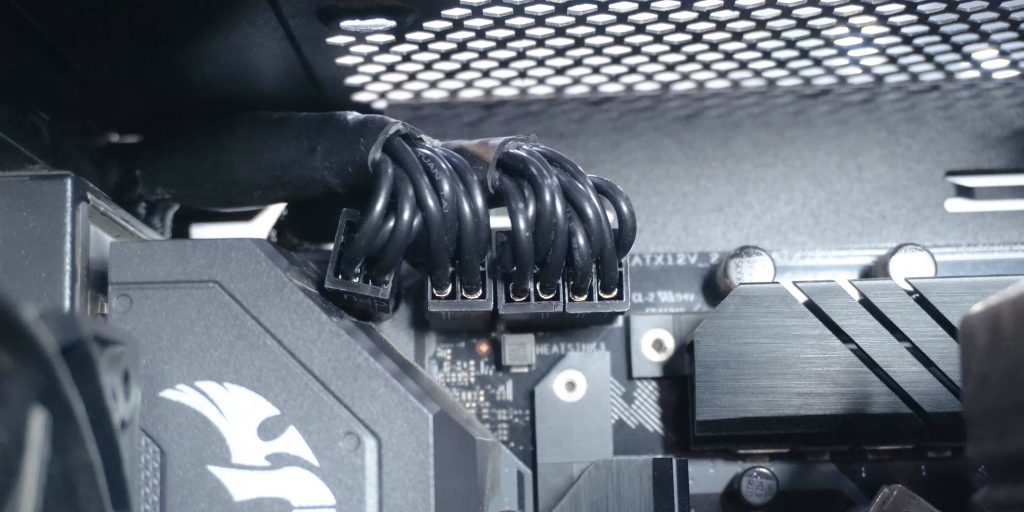
Now because my CPU cooler and stuff were already installed and I was too lazy to take out everything I tried to connect the other EATX pins without uninstalling anything from the system. But because of the extremely narrow space and my huge frigging hand, I wounded my knuckles a bit. So once I saw the blood, the bulb on top of my head lit, and I figured I could just put a cloth over the heatsink of the cooler to protect it from further damage. I also took out the top exhaust fan because getting wounded injected some sanity in me.
Some motherboards support 8 + 4 pins for the EATX connectors to supply more power to the CPU in case it is being extremely overclocked. If your motherboard doesn’t have the extra 4 pins, then do not worry at all. That means your motherboard can’t support extreme overclocking anyway. Also, many of the lower wattage power supplies don’t have the extra 4 pins for the EATX connector, implying that can’t support the extra overclocking you expect the poor power supply to do.
So after connecting the 8 + 4 pins, the toughest part of the whole installation process was almost over. After this, I connected the SATA power connector to the single 3.5 inches hard drive. And the Molex connector was used to power the ARGB fans connector which are in the front. So everything just worked out fine in the end. Well, except for the bruises I got on my hand.

And I swear this time I did some cable management and you can rate it if you want. But wait. Don’t. I was kidding.
🛒Amazon India – https://amzn.to/3tRZlnv (HCG 850W)
🛒Amazon US – https://amzn.to/3tLzKfQ (HCG 850W)
https://amzn.to/3p9r3bK (HCG 1000W)
🛒Amazon UK: https://amzn.to/3tU0YAY (HCG 850W)
https://amzn.to/3pcCeQP (HCG 1000W) [paid links]
💬Join our community on discord: https://discord.gg/TsMHuPhjQ2
So stay safe humans. That’s all for today. MuBot out.