

This complete NZXT Build was surely an Experience ft. H510 Elite, Kraken Z63, N7 Z590.
So, what do you get when you add NZXT’s case to NZXT’s AIO to NZXT’s PSU to NZXT’s motherboard.
NZXT-ception?
Sorry….

I want to thank NZXT for sending me all this stuff for the build. Because really if they didn’t then I wouldn’t have had this stuff to make this post on.

Also a special thanks to Intel for sending me the Intel i9 11900K. As without it building on a Z590 platform wouldn’t have been possible.
The 11th series of Intel now supports PCI-E GEN 4.0. And the 11900K comes with 8 cores and 16 threads with a max turbo frequency of up to 5.3GHz. I was able to touch 5GHz all-core frequency pretty easily with a moderate overclock.

The case we are going to build in is the H510 elite which is a mid-tower case. And it is white AF. The paint finish is really nice here and I truly loved the surfacing they have achieved on the case. The metal material underneath feels quite solid and the ability to pull out filters just like that is pretty sweet. This means you won’t need to attempt a hit and trial method when you install it back.
Nobody is gonna look at the right side of the case. And maybe that’s why NZXT has put this long and wide array of ventilation holes there. And inside you’d find the NZXT control hub with all the specific labels on it. Denoting what those specific things – specifically do. The ports on top are limited but they are nicely embossed in and look quite clean.

What I didn’t get though was that the top rear end abruptly has these black perforations. I mean it doesn’t look that bad but they could have painted those screws white too. Which might have helped it blend a bit nicely with the overall whiteness of the case.

The feet are tall and are as tall as they can be. This will definitely help your power supply & the front fans for sucking in as much air as possible. But get ready to lose a bunch of stuff and even some small frigging hands under it.
The tempered side panel is hooked with just 1 screw. And then you need to just push it towards the opposite side. Make sure you support it as you remove it. Otherwise, it will crash and no one is gonna send you a free replacement.

And as you can notice on the back of the case, the PSU will go on the bottom. And there is a dedicated area for mounting your GPU vertically too.

The NZXT Z7 Z590 is a motherboard for casual builders; who’d love a decent performance with a good-looking white or black-themed designed motherboard. But if you are a serious punchy overclocker, I think you already know this isn’t the board for you. And it’s not like as if NZXT tried to market the motherboard as an overclocking board too. But if you just mildly push the clocks on your chip like me, the motherboard shouldn’t give you any trouble.
It supports both 10th and 11th Gen processors from Intel. With maximum support of up to 128GB of RAM with a max memory frequency support of 4600 MHz. [A] The board also supports PCIe Gen 4.0 which the 11th Gen Intels like too. So if you wanna get in the race of achieving that fastest storage on an NVMe drive – you are most welcome to do so here.

In the box, you get 2 antennas, 2 m.2 screws and 2 SATA cables, and a manual which opens up like a newspaper.
When it comes to how the motherboard looks, there are these huge chunks of white covers that cover the whole motherboard almost completely. It kind of gives it a bland look but I imagine with all the components installed on it, the leftover patches of whites will give a good justice to most of the white-themed builds.

What I really liked though is how neatly they hid the Nvme heatsinks with the overall design of the motherboard. I think when they were designing this the only motto here was to throw some whites on it and then some more.
There are many frigging ports on the IO shield but as you can notice there is a limited number of SATA ports due to the limited number of PCIe lanes. I really liked how the different types of screws were in their individual pouches with their type labeled on top of them.

And as I was installing the motherboard in, I realized that damn in this case, you can’t really add more than 1 fan on the top and it’s good that the case came with a 140mm top-mounted fan by default.
Well, all the standoff screws were already installed so mounting the motherboard was easy peasy and no one can really forget to install the IO shield too as it was already stacked on the motherboard. Now the case manual also clearly mentioned which labeled screw will go where, so yeah a pretty seamless process so far.

But make sure you have a long and thin magnetic screwdriver otherwise putting these screws inside might feel like finding a needle in a haystack.
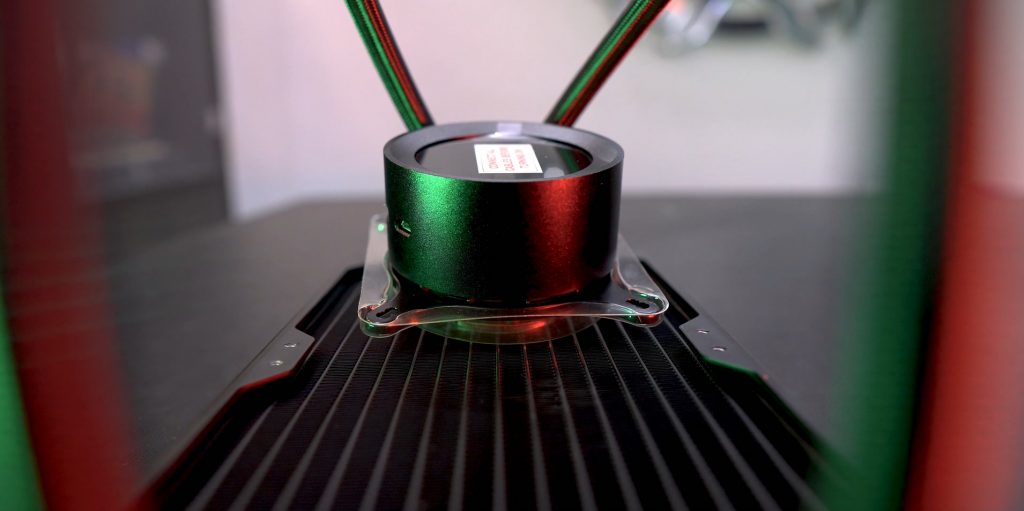
The AIO which will go inside this build is the Kraken z63 which is a 280mm AIO and has this beautiful 2.36 inch 24-Bit color screen. It comes with a pair of 140mm Aer P radiator fans which are pretty darn good performers.

Installing the pump for the Intel socket was a breeze. But as mentioned already you can’t really mount the radiator on the top so it had to go at the front here. And that was the trickiest part of installing the AIO here. You can watch the Kraken Z63 full review in the following video.

The power supply I received was the C series 750 watts which is 80 plus gold certified and is completely modular. It’s manufactured by Seasonic and is backed with 10 years of warranty so yeah you don’t need to sweat about their reliability.

The cables came in a pouch which can also be used as a makeup stuff bag for your girlfriend or wife or even for yourself if you are into that kind of stuff. All of the cables supplied with the power supply had proper labels on it denoting which side is for what and goes where.
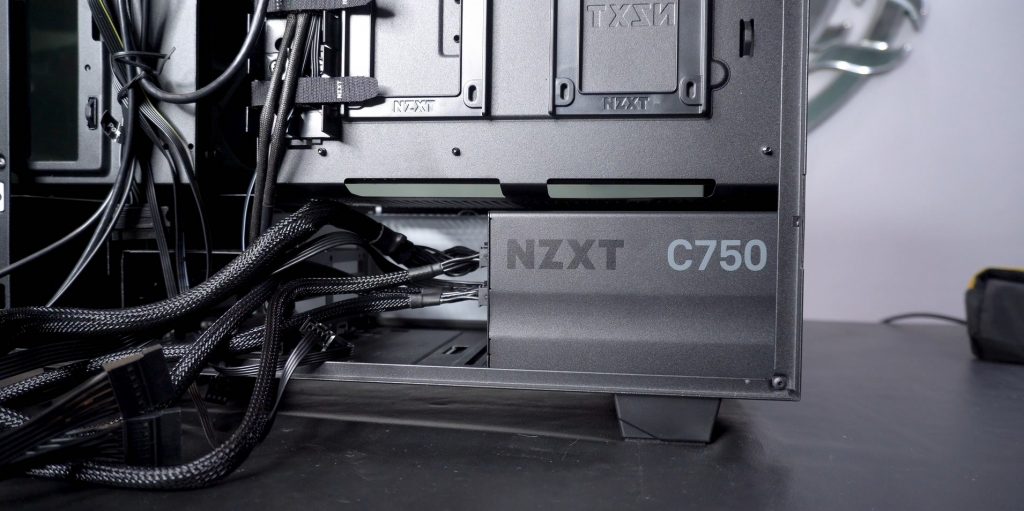
The elite 510 had ample friggin space inside the PSU shroud so I had no problems installing the power supply there.
The motherboard has two 8+4 pin ATX 12V power connectors which denote that you can definitely push it for extreme overclocks but I’d suggest you not to.
For installing a 2.5 inch SSD you’d need to pull off its casing from the back of the case and it could definitely have been of better quality. Probably the only thing in the whole case which didn’t feel solid so far. And to install a 3.5-inch hard drive you have to unscrew the whole bracket and then screw the hard drive in.

For the GPU I used my one and only RTX 3080 FE as I literally have one GPU here. Rest I spend on food.

On the left side of the case, I saw this connector dangling and it drove me nuts that where does it exactly go in. And it is not supposed to go anywhere. It’s an extendable connector if you plan to add more RGB strips in the case.

I did find the top most slit of the case to be pretty congested though. It needs some work to get the thick connectors through it. I really liked how nicely the cable management can be done on the case. NZXT made sure to give you ample amounts of slits and straps to do it conveniently in the case.
The motherboard also came with a Bluetooth and WiFi 6E antennas so you can use them too. The speeds from the wifi from my basic 5GHz router was fine at a good distance of about 30 feet.


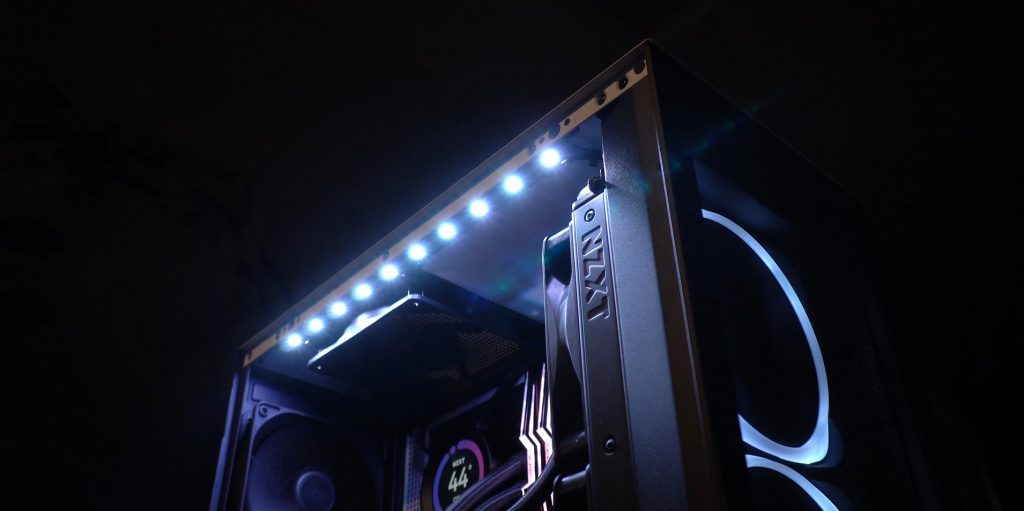
I really love how the overall build looks by the end. The front default lighting of these two 140mm fans looks very portal-ly and I really liked the design of that game. The dark tempered glass makes the lighting of these fans and the LED strip of the case pretty subtle which doesn’t hurt the eyes or look sore. And now I do understand why NZXT kinda forces us to mount the radiators upfront. This can primarily be of 2 reasons that either NZXT wants to have this sort of signature look in all of its builds. And the other reason could be that this setup can look kinda clean overall by not trying to sandwich the thick radiator and its fans on the top of the case. But anyway this is totally subjective.

The first thing I did was to install the NZXT cam software and it just worked seamlessly with all the components installed inside the system in the NZXT ecosystem. Except for my XPG RAMs which were not compatible with CAM software so I had to install its own software separately.
The NZXT Cam software felt pretty easy to use. The UI is clean and I was easily able to understand what does what here from first use itself. There was a list of default presets if you are someone as lazy as me for the overall aesthetics of a build. And I didn’t know that you could also customize each LED individually of the front fans and the RGB strip on the top too. If only I could maximize it to full screen to have more real estate for all the features it offers.
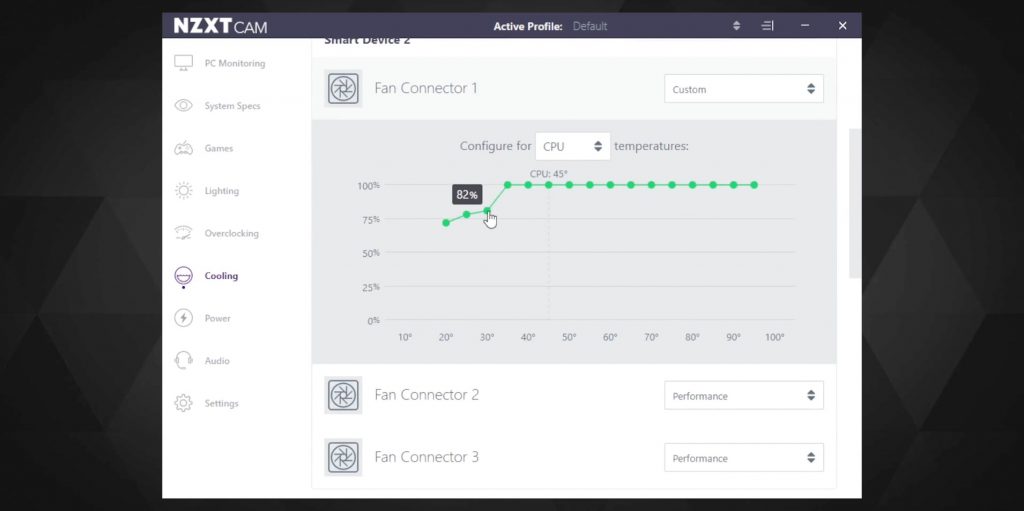
Alongside monitoring which fan is running at what speeds, you can also adjust the curves of each and every fan and the pump speed here too. I couldn’t really find the curves adjustment feature graphically in the BIOS so this is where you gotta do it.
You can choose whether the fan curves should react to CPU temperatures or the GPU temperatures but I think most of us will not change anything here. The C series power supply doesn’t support the power monitoring in the CAM software so if you need that then you gotta buy the E series.

I did some overclocking on the board and I was able to push 5GHz all core performance easily via the BIOS. Just make sure you remove the power limits and max current range to these settings if you wanna try them too otherwise no matter what you do the clocks will keep dropping after a while.
If you are someone who is scared of BIOS tweaks you can also try Intel Performance Maximizer which is auto overclocking software by Intel themselves. With it I was able to get 4.9GHz all core performance.

On the stock settings of the CPU, I was able to get a multi-core score of 14300 in the Cinebench R23 test with an average temperature of 65.7 degrees celsius and with an average power consumption of 153 watts.

And when I ran the chip at 4.9GHz all core after some moderate overclocking the score increased to 15700 with an average temperature of 79 degrees celsius and with an average power consumption of 205 watts. Do note that the ambient temps were around 31.7 degrees C during both of these tests.

To push the thermals more and check how the case performs, I ran FurMark and Cinebench R23 together at the same time with the processor overclocked to 5GHz all core this time and the temperatures did cross 90 degrees celsius this time for the CPU and the GPU reached till 83 degrees which is quite typical for the RTX 3080 FE. But the ambient temps had reached 32.7 degrees by now. And you gotta understand that the chip and the RTX 3080 together were churning about 570 watts of power which is no walk in the park.

During the superposition test which stresses the GPU mostly and replicates what games do to our system, the GPU temperatures didn’t cross 82 degrees which is again quite typical for the RTX 3080 FE.
The motherboard temperatures didn’t cross 51 degrees celsius throughout these tests.
I have noticed that a lot of people curse on this case because of its bad ventilation and the inability to keep the components inside cool. But in my testing and looking at all these results I was pretty much satisfied. And I can’t really claim it to be bad. Just make sure you add a good 280mm AIO upfront in the case as a lot of people ignore that part and might just go for 240mm radiators. Also getting an air cooler inside this case would be a pretty terrible idea especially if you are putting a CPU above 8 cores in it.
If the processor which is going in your build isn’t going to be as thermally demanding as the 8-core Intel 11900K here or for example a Ryzen 5800X, and if it’s something of a 6 core processor that won’t consume more than 110 or 120 watts of power, then you might be able to afford to keep that cable bar there and skip adding the radiator fans. But I am someone who’d always prefer installing them there no matter what chip you use.
The noise levels were moderately audible at performance fan curves preset as there are five 140mm fans in the case which can get quite fast so a moderate sound level was expected. But in my regular testing and with a fan over the top of my head, it wasn’t much audible.
Now only if NZXT launches their NZXT BLD program here for India too, the ease of custom building an NZXT PC will definitely get them more buyers who can afford it at least. But I am not sure if it’s in the works or not but hopefully, they will consider it.
Amazon India:
🛒NZXT H510 Elite: https://amzn.to/3sn4SCb
🛒NZXT Kraken Z63: https://amzn.to/3m4CLGD
🛒NZXT C750 PSU: https://amzn.to/3m8hoVa
Amazon US:
🛒NZXT H510 Elite: https://amzn.to/2XmS2Z6
🛒NZXT Kraken Z63: https://amzn.to/3COI2rT
🛒NZXT C750 PSU: https://amzn.to/3m4SC8j
💬Join our community on discord: https://discord.gg/TsMHuPhjQ2
Hope you enjoyed this detailed experience of completing a complete NZXT build. Stay safe humans. That’s all for today. MuBot out.